www.jb-electronics.de » Elektronik » Nixie-Röhren » Selbstgebaute Nixies
Selbstgebaute Nixies
Nixie-Röhren zu Hause selber bauen - das setzte ich mir irgendwann im Jahr 2011 in den Kopf. "Unmöglich" sagen die einen, "durchaus machbar" sagen die anderen. Auf diesen Seiten möchte ich meine Erfahrungen zu diesem Thema sammeln.
Es gibt viele verschiedene Wege, die auf dem Weg zu eigenen Röhren eingeschlagen werden können; ich bin kein Profi im Röhrenbau und schreibe hier lediglich meine Erfolge und Misserfolge nieder. Zum einen, um anderen zu helfen, die vielleicht die selbe Idee haben. Zum anderen aber auch, um zu zeigen, dass es selbst in unserer heutigen Wegwerfgesellschaft immer noch möglich ist, vermeintlich komplizierte Produkte selbst herzustellen.
Ich stelle daher zunächst die nötigen Gerätschaften vor, die zum Röhrenbau benötigt werden; am Ende der Seite finden Sie schließlich die Glimmlampen und Nixies, die ich hergestellt habe.
Aufgrund von Zeit- und Ressourcenmangel ist das Projekt zur Zeit pausiert.
Notwendige Werkzeuge und Geräte
Für den Röhrenbau werden einige spezielle Geräte und Vorrichtungen benötigt, die ich hier vorstelle.
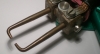 |
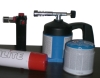
Punktschweißgerät: Wenn immer verschiedene metallische Komponenten hitzebeständig verbunden werden sollen, wird ein Punktschweißgerät benötigt. [Mehr Informationen] |
Das Leuchtgas
Auch wenn meine ersten Röhren mit Luft arbeiten (welche ein violettes Leuchten erzeugt), ist für höhere Lebensdauern Edelgas erforderlich.
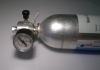 |
Gase: Nixies arbeiten mit Neon und einer kleinen Menge Argon, hier wird auf Bezugsquellen dieser Gase eingegangen. [Mehr Informationen] |
Röhrenkonstruktion: Materialien
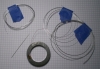 |
Materialien: Isolatoren, Drähte, Gitter, und so weiter: hier werden die benötigten Materialien für das Innere der Röhren vorgestellt. [Mehr Informationen] |
Glasbearbeitung
Aber nur mit der Beschaffung der entsprechenden Geräte und Materialien ist es nicht getan; gerade die Glasbearbeitung erfordert viel Geduld und viel Übung. Ich möchte daher an dieser Stelle einige für den Röhrenbau relevante Aspekte der Glasbearbeitung vorstellen.
 |
Welches Glas: Ich wusste zu Beginn gar nicht, wie viele verschiedene Glassorten es eigentlich gibt. Dieses Thema möchte ich hier ein bisschen näher beleuchten. [Mehr Informationen] |
 |
Brenner: Für die Glasbearbeitung werden verschiedene Brenner benötigt, die für einfache Anwendungsgebiete noch nicht mal teuer sein müssen. Hier stelle ich meine verwendeten Brenner vor. [Mehr Informationen] |
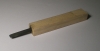 |
Graphitwerkzeuge: Zum Verformen von heißem Glas eignet sich Graphit hervorragend. Doch professionell gefertige Wekzeuge kosten viel Geld; hier wird beschrieben, wie sich einfache Graphitwerkzeuge selbst herstellen lassen. [Mehr Informationen] |
 |
Glasrohre schneiden: Kleine Glasrohre, wie etwa Pumpstutzen, müssen oft auf die richtige Länge geschnitten werden. Das funktioniert mit einem Glasschneidemesser sehr einfach, ganz ohne Diamantsäge. [Mehr Informationen] |
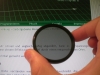 |
Polfilter: Mit einem linearen Polarisationsfilter und polarisiertem Licht eines LCD-Monitors lassen sich Spannungen im Glas erkennen. [Mehr Informationen] |
Eigene Glimmlampen
Bevor ich mich an Nixie-Röhren im klassischen Sinne wagte, sollten einfache zwei- und mehrpolige Glimmlampen gebaut werden, die ich hier vorstellen möchte. Farblich markiert sind defekte, eingeschränkt funktionsfähige sowie vollkommen funktionsfähige Röhren.
| Bezeichnung | Foto | Kommentar | |
| GL-LS-1 | 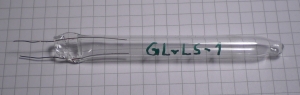 | Luft @ 9mbar; Elektrodenabstand zu groß; Ausplatzer am Quetschsiegel | |
| GL-LS-2 | 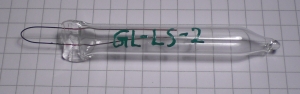 | Luft @ 9mbar; Siegel defekt | |
| GL-LS-3 | 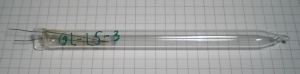 | Luft @ 9mbar; Siegel nicht ganz perfekt | |
| GL-LS-4 | 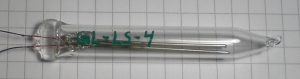 | Luft @ 15mbar; Edelstahl-Elektroden | |
| GL-LS-5 | 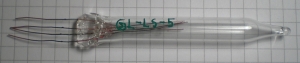 | vierpolig; am Quetschsiegel geplatzt | |
| GL-LS-6 | 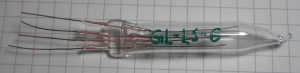 | Luft @ 15mbar; vierpolig | |
| GL-LS-7 | 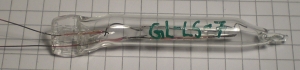 | Luft @ 15mbar; Doppelpunktröhre; am Vakuumsiegel geplatzt | |
| GL-LS-8 | 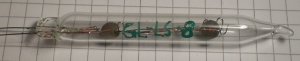 | Luft @ 15mbar; Doppelpunktröhre; wegen interner Parallelschaltung leuchtet immer nur ein Punkt | |
| GL-LS-9 |  | Luft @ 15mbar; Doppelpunktröhre mit separat ansteuerbaren Punkten; am Vakuumsiegel geplatzt | |
| GL-LS-10 | 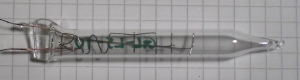 | Luft @ 15mbar; Schriftzug-Röhre | |
| GL-LS-11 | 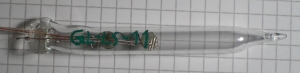 | Luft @ 15mbar; Doppelpunkt-Röhre | |
| GL-LS-12 | 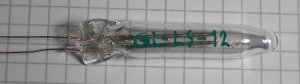 | Luft @ 15mbar; am Quetschsiegel geplatzt | |
| GL-LS-13 | 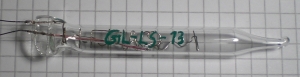 | Luft @ 15mbar; Schriftzug-Röhre mit internem Kurzschluss | |
Eigene Nixie-Röhren
Als ich einige Grundzüge des Glimmlampen-Bauens verstanden hatte, wurden auch direkt die ersten Nixies gebaut, die ich hier vorstelle:
| Bezeichnung | Foto | Ziffernhöhe (mm) | Symbole | Kommentar | |
| NX-LS-1 | 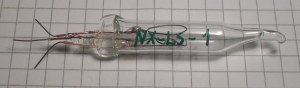 | 10 | 0, 1 | Luft @ 15mbar; das Anodengitter ist auch als Symbol ansteuerbar | |
| NX-LS-2 | 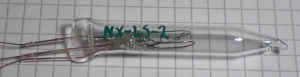 | 10 | 0, 1 | Luft @ 15mbar; Edelstahlelektroden; Glimmen nur an Symbol-Zuleitungen | |
Weiterführende Links
Es gibt eine handvoll Menschen, die genau wie ich selber Röhren herstellen, aber schon wesentlich weiter sind. Die Herangehensweisen sind verschieden, aber die Ergebnisse phänomenal. Hier sind einige entsprechende Webseiten zu finden:
- http://dalibor.farny.cz/
Dalibor Farnys Webseite. Die besten selbstgebauten Nixes der Welt! - http://www.tubedevices.com/alek/
Aleksander Zawada ist der Pionier selbstgebauter Nixies. Auf seiner Webseite stellt er viele seiner selbstgebauten Röhren vor. - http://www.tubecrafter.com/
Ron Soyland ist wahrscheinlich der erfahrenste Hobby-Röhrenbauer der Welt. Seine Webseite ist eine fantastische Resource mit vielen Details. - http://www.youtube.com/user/glasslinger/
Ron Soylands Youtube-Kanal, eine Menge an interessanten Videos. Schauen Sie dem Meister über den Rücken, während er faszinierende Röhren baut! - http://www.imajeenyus.com/
Lindsay Wilsons Webseite mit selbstgebauten Gasentladungsanzeigen und einer Bauanleitung für eine Glasdrehbank - sehr lesenswert. - http://www.ruediger-walz.de/
Rüdiger Walzs Webseite; detaillierte Beschreibung eines Röhren-Pumpstandes. - http://www.neon-john.net/
John DeArmonds Webseite; detallierte Beschreibung eines Vakuumsystems ganz aus Metall ohne Glasteile - sehr lesenswert. - http://www.teralab.co.uk/
Robert Hunts Webseite. Selbstgebaute Glühlämpchen und viele nützliche Tips und Anleitungen zur Glasbläserei.